pictures

              shop                               facebook                                blog

Friday, October 30, 2015

all hallow's eve...

 
I just want to wish you all an early Happy Halloween...
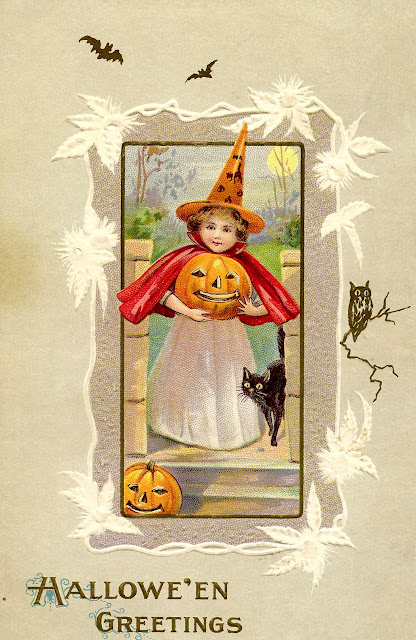
and share a few of my favorite vintage Halloween images.

 
My favorites have this soft pastel palette.
Not the typical colors expected for Halloween!

 
Isn't she lovely...

 
It's hard to pick a favorite...


I love them all...
 
 
The rest are more traditional Halloween colors
and I love them too...


Some are spooky...

 
and some are sweet...

 
Tomorrow is Halloween...
so I will wish you all
a very safe and happy holiday weekend ahead.
 
 
BOO!

Sunday, October 25, 2015

trick-or-treat...

A few years ago I wrote an article on how to create charming
trick-or-treat bags. They are very easy to make and once you see the directions, you can let your mind go wild and really
push the limits of your creativity...


Materials:
Felt
Thread and embroidery floss, needles
Buttons
Wire
Beads
Miscellaneous fabric, lace and trim
Vintage rhinestone jewelry
Pen
Glue gun
Scissors
Needle nose pliers 

Sketch the outline for the treat bag onto the felt. The black cat, pumpkin and skull are all simple, easy and traditionally iconic
symbols of Halloween.

 
 The treat bag can be the shape of the design or it can be placed on a rectangle of felt. Cut out the design as well as the front and back of the base of the bag. Use a different colored felt and cut out two rectangles slightly larger than the design.

 
Begin to add embellishments. Mark areas for hand stitched details and experiment with decorative buttons.

 
Create detail with hand stitching then secure buttons in place with needle and thread or a touch of hot glue.

 
Center the design onto the backing rectangle of felt. Carefully glue in place with a small bead of hot glue or fabric glue.

 
Line up the front and back panels of felt and stitch around the
sides and bottom leaving the top open.

 
Determine the length you would like for the handle. Measure out the determined length for the handle then add two inches. Cut the wire and loop one end. Fill the wire with decorative beads leaving one inch to create a loop at the end.

 
Stitch both looped ends to the open corners of the bag. Finish with a touch of hot glue to secure the handles in place.

 
Finish the treat bag with bits of vintage jewelry and lace for a touch of romantic Victorian elegance. 
 

Halloween is a time for over the top décor and embellishments. Embrace your inner gilded goddess and create a truly special and one-of-a-kind goodie bag.
 
Or maybe you will need a charming clutch to carry to a Halloween costume party this year! Be creative and don’t hold back. Surround yourself with excess ornamentation on All Hallows Eve! 

 
It will be a joy to make and a delight to give. Fill it to the brim with splendid candies for someone special. I hope you are inspired to make a frightful and delightful Halloween bag this year!
 

Friday, October 23, 2015

dried to perfection

For all of you that inquired about my pictures of dried gourds...
 
It's as easy as can be!
 
I've written magazine articles and blog posts about this before but I had so many messages that I thought I would share it again.
 
The very best way to dry gourds is to actually allow them to dry on the vine before picking them. However, most of us buy precious little bundles of gourds for fall decorating. 

Once I have fully enjoyed my gourds in their fresh state, I look for just the right time to dry them. Sometimes they will begin to dry on their own. Keep them out of direct sunlight and away from moisture. The idea is to keep them from rotting. They will become lighter in weight and you might be able to hear the seeds begin to rattle as the drying process begins.
To encourage drying, I will punch holes in the bottom by tapping a nail into the skin with a hammer. Then the gourds can be hung in a warm dry place. Be sure to place a drip pan under the gourds.
If I am trying to hurry the process along, I will place the partially dried gourds (with holes in the bottom) onto a parchment covered cookie sheet in the oven on low. Then allow the gourds to slowly dehydrate.
You will know the gourds are dry when the shell is hard and you can rattle the seeds within.
Once the gourds are completely dry, I will gently sand the surface with a piece of steel wool. Wipe clean then paint. I have used everything from spray paint to house paint. Matte finishes work best. Once dry, gently sand the finish for a distressed look.
 
Even though I do like a white palette, I will still mix my "whites" by painting the gourds in different shades.

 
Paint them to match your décor...any color!

 
It's amazing how much the detail shows up
once they are dried and painted!

 
I like to pepper them throughout my home and tuck in bits of dried flowers like these amazing green hydrangeas...

 
I really hope you like the idea!
 
Keep in mind that you will be working with natural materials and results will vary. I have had gourds dry very well while others simply rot or fall apart. Experiment with different varieties. I like this project so much that I photographed these same gourds for Flea Market Décor magazine's 2015 fall issue...
 

Some of my dried gourds are 10 to 15 years old now. I am careful to keep them away from moisture and I always store them in a cool dry place. I'll be excited to hear if anyone tries this project!
It's a lot of fun...

Monday, October 19, 2015

fun with felt

Pumpkins are the quintessential sign that fall has arrived.
I love to see them popping up in many different forms and colors. For my article in the fall issue of Cottages and Bungalows magazine I wrote an article featuring pumpkin and gourd crafts.
Pictured below are the "how-to" steps for creating
a whimsical felted pumpkin...enjoy!


Felt Pumpkin
Materials:
Felt (pumpkin) and coordinating solid color cotton fabrics (stem and leaves)
Manila folder and pen or pencil
Small bag of cotton fiberfill (and pebbles)
Needle and thread
Florist wire
Scissors
Glue gun and glue sticks
Brown marker or brown shoe polish
 
Instructions:
1. Make a template for the pumpkin “panels” using a manila folder. The widest width is 3” and the length is 12” (see photo).
2. Cut out 12 pattern pieces using the manila template from a fabric of choice.
 
 
3. Pin panels right sides together.
4. Stitch the panels together to form the pumpkin shape (it will be inside out) and leave a small opening for filling.
5. Turn pumpkin right side out and fill with fiberfill or batting. Sometimes it is helpful to add weight to the pumpkin so consider tucking a few small clean rocks into the center of the filling. Close the opening once filled with a few stitches.
 
 
6. Create a fabric stem or use a real twig or branch. Sew or hot glue the stem at the top of the pumpkin.
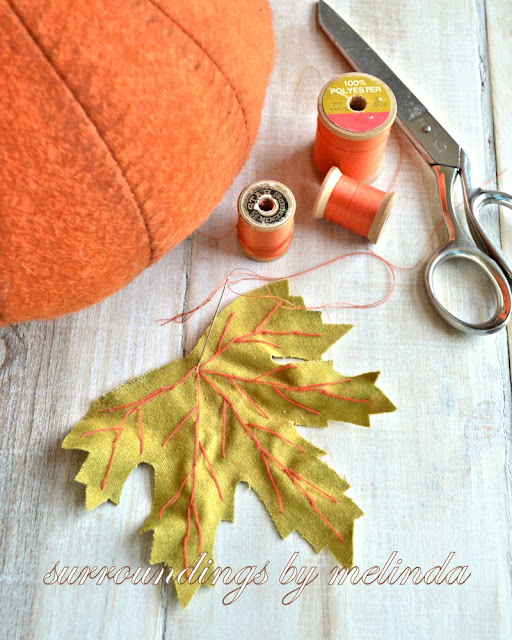
7. Make leaves by cutting a 5” x 5” square of fabric. Hand sketch or use a template to create a leaf pattern on the fabric square and neatly cut out the design.
 
 
8. For a realistic detail, hand-stitch the leaf veins using contrasting thread.
 
 
9.  Hot glue lengths of wire to the back of the leaves to give them shape then hot glue in place at the base of the stem. Make a few vines by wrapping wire around a pencil then glue the wire vine at the base of the stem near the leaves.


To give the felt an aged appearance, lightly darken along the seams with a brown marker or a touch of brown shoe polish.


Be careful and have a gentle touch!

 
This project was featured in the Fall issue of
 
 
Let this fall holiday craft project be your guide...
 
 
...then add your own personal spin.
 
 
 Create pumpkins in colors that tickle your fancy and add embellishments that coordinate to your personal style.
 
 
The next thing you know...you’ll have a pretty pumpkin patch
sprouting up right inside your home.