pictures

              shop                               facebook                                blog
Showing posts with label crafts. Show all posts

Friday, February 12, 2021

hand sewn hearts

 Although rainy days are a rare occurrence here, especially this time of year, I like to be stationed in my sewing room. It seems like the perfect reason not to be in my garden.

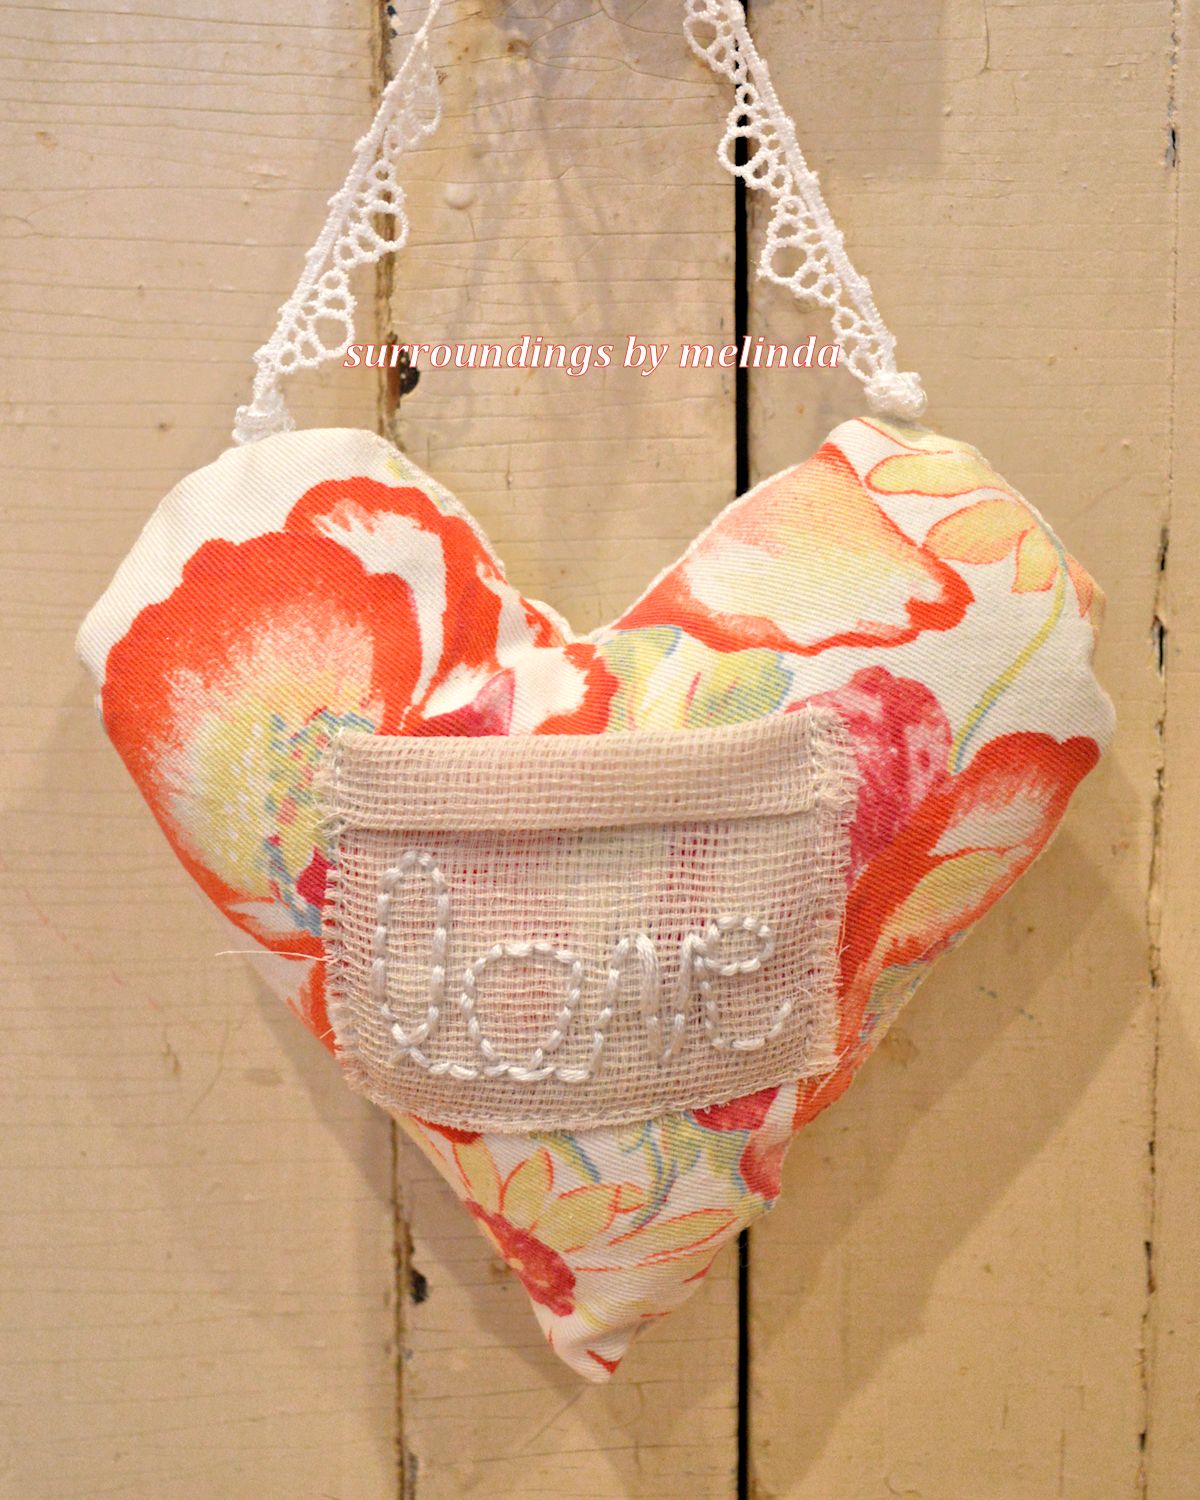
Right now my heart is thinking of love. So why not make some Valentine's Day vintage fabric hearts. Normally I make these hearts in all neutral colors and I sew on an antique key. I call these the "key to my heart" mini heart pillows.

But these are a little different. I've been saving this wonderful old cotton and linen table runner. Although there are stains, I loved the vibrant colors of the floral design. So I cut out as many hearts (roughly 6-8 inches each) as I could, trying to carefully avoid the stains. They are filled with batting and I added small pockets on each.


All of the pockets have a hand stitched message of love and include a small ephemera card so a personal message can be written inside.


No two hearts are the same because the way I cut the fabric from the table runner. And each little pocket is different as well.


The extra tiny pockets can also be used as tooth fairy pillows for wee ones. It's nice because the "fairy" doesn't have to fish the small tooth out from under the pillow of a sleeping child.


The slightly larger pockets can hold a letter, photo or gift card.


I had great fun creating these small puffed heart pillows.


If you are inclined to make handmade gifts for family and friends, this project is very simple. It's great for beginner seamstresses.

Nothing beats a handmade gift from the heart. After all, most of us are not out doing a lot of shopping right now.

I wish you...lovely projects for rainy days.

Monday, January 18, 2021

kokedama

 As it is no surprise, I adore all things gardening. And living in Florida, I have learned so much about southern gardening. I have also learned to love orchids!

Part of this love affair has included my introduction to kokedama. Which is a Japanese style of gardening. It means "moss ball gardening".

I would like to share with you how I make my kokedamas...


What you will need...

orchid

sheet moss

orchid potting mix

fishing line

scissors

My tip is to purchase orchids that have already bloomed and been placed on clearance. I buy mine at Lowes, Home Depot and Walmart. They are a fraction of the cost!


Gently remove the orchid from the container making sure not to damage the delicate roots.


Lay a sheet of moss with the moss side down. Then place a thin layer of orchid mix in the center of the sheet.


Now place the root ball of the orchid on the soil. Position it like the above photo.


I carefully wrap the moss around the root ball, adding soil mix as I go. Once the ball is completely covered with soil and moss, I use the fishing line to secure the moss.


The last step is to leave enough excess fishing line to create a hanger with a loop at the end.


It is a fairly simple way to display and grow orchids. I will hang them under the grape arbor so they are protected from winds and summer storms and they only get dappled sunlight which makes them really thrive.

Stay tuned and I will share these little beauties blooming in my garden.

Friday, January 8, 2021

stitched with love

 For those of you who sent a note and asked about the quilt angel in the post from January 1st, I can't share where I purchased it.

Because I didn't buy it, I made it! And it is so easy to make. I have shared vintage quilt projects in the past, I have even shared them in magazines. I'm happy to share it again.

Here is a quick tutorial...


I don't have a pattern that I use, these are the basic shapes. Remember you need two identical pieces for a front and back for the head, body and arms.


Once stitched wrong sides together, turn it right side out and fill with batting. You can even add dried lavender and rose petal potpourri to create a scented sachet.


I create a retro 1930's hair style with yarn. The face is simply two light blue dots with a fabric pen and pale pink cheeks. Use your creativity and make any hairstyle in any color you wish: red braids, brown curly locks or long blond tresses.


For the wings, I find an old doily and weave a circle around the outer edge with wire. Then pinch the circle together in the center to form a double wing shape.


Fasten the wings to the back with stitches or hot glue. Then embellish your angel in any way you like.


I like to bring the arms together in the front to give the appearance of praying. Sometimes I place a starfish in her arms or flowers or a vintage ornament.


These precious angels can be made in any size. These are just a few tips to get you started. Use your imagination to create your special angel. This is a wonderful project for beginners just learning to sew!

And please don't worry, no quilts in good condition were harmed in the making of this angel. I use something called a cutter quilt for my craft projects. Cutter quilts are damaged and in very poor condition, yet there are sections salvageable for projects. These quilts are found at yard sales and thrift shops for just a few dollars.

Do you have a favorite craft project that you have enjoyed making during the pandemic? I lost my creative way for a bit, but revisiting things I've made in the past is helping to restore my joy.

Feel free to share your project ideas,
I love to be inspired by others!

Friday, August 28, 2020

a shining light

 Since my last post, I have been thinking a lot about family and some of my favorite times together.

My mom and I could pick up seashells every day and never tire.

My dad is a selfless soul that could take or leave shelling, but he is at his happiest just at the sight of his family doing something that brings them joy.

So my mom and I would collect as many treasures as we could find and my dad would haul them all to the house.

Once the shells were all cleaned, I thought it would be nice to do something with them that my dad could enjoy and help me with. Before I moved to Florida, my dad and I would spend most weekends in his garage creating, fixing, painting or refinishing things for my shop.

So a daddy-daughter seashell project was on my radar.

The vintage shell lamp...


I always have a "to-do" stash of projects in my garage or in storage. I thought a lamp might be a great project for us to tackle.


I had an old rusty outdoor post light with a fabulous aged brass sea green patina.


First, my dad removed the original wiring and replaced it with wiring suitable for an indoor lamp. Equipped with a plug and toggle switch. 

The original fixture would have been atop a solid post, so as it stood now, it was top heavy. So I rummaged through my vintage wood stash and found a weathered wooded block and a grey-blue board. Both have a driftwood look perfect for this project.


I replaced the candlelight arms with new sleeves and placed seashells inside the glass hurricane shade. 


I must say the finished product is spectacular!

The best part is that I was able to combine both my mom and dad in a project that will always make me think of them.

Friday, August 7, 2020

aquarium upcycle

 Since my last post is fresh on my mind, I thought I would share an idea I wrote about some time ago for one of my favorite magazines.

aquarium upcycle

It's pretty easy to find an aquarium at a yard sale or junk shop. This is a quick, easy and inexpensive way to recycle an old tank into a creative and elegant terrarium.

You don't need much to get started.

fish tank

pebbles

decorative rock or shells

potting soil

plants

decorative tape and glass shelf optional


Test the tank to be sure the bottom holds water without leaking.
If it does leak, simply use a waterproof clear caulk in the seams and allow to dry.
Starting on the bottom: layer small clean pebbles then add sterile potting soil.
Next, arrange the plants you wish to use. Once placed, be sure the roots are all covered with soil.
Lastly, secure the soil and plants with a layer of decorative river stone and or sea shells. If using shells, clean them very well so no sea salt residue remains.


I used a decorative tape around the top edge to add a touch of elegance to the finished terrarium.


This type of terrarium makes a lovely centerpiece.


I placed a piece of glass shelving that I had in my craft stash so I could display things on top.


Select the type of plants depending on whether or not your piece will have a top or lid.

Open terrarium:
air plants, succulents or cactus

Closed terrarium:
any plant that likes a damp environment
ivy, fern and tropical plants

Next time you see a small aquarium on a curb or inexpensively at a yard sale, why not take a chance and create a beautiful terrarium.


Saturday, May 16, 2020

succulent art

This is for my gardening friends:
you know who you are!
And I miss you all terribly...

Succulents are wonderful additions to any garden. I have always loved them, but since I've become a southern girl, I adore them.
 
They are all throughout my property, but I have my main beauties on my porches. I would like to share what I do with my baby succulents.
 
I make succulent art...
 

The process is simple.
You will need:
shallow dish
small pebbles
cactus soil
tiny decorative pot
baby succulents
white crushed shell or rock
 
 
Fill the bottom of your container
with a layer of clean pebbles.
 
 
Add cactus soil, or any well draining soil mix on top of the pebbles. Fill to 1/2 an inch below the top of the container.
 
 
Center the decorative pot (or vintage tea cups work well too) and bury all but the facing. If you have any broken or chipped tiny containers or tea cups, this is the perfect project for them!
 
 
Begin arranging your succulents. Start with the largest in the center and work your way out.


You can also used cuttings for this project!
 
 
Plant all but the tiniest succulents. Then carefully add a layer of clean decorative crushed shell over the entire surface of soil.
 
 
Use a skewer to poke holes through the shell to place the tiniest succulents as a lovely and delicate finishing touch,
 
 
It's an easy project that takes almost no time! And I think you will be thrilled with the result!
 
 
I suggest instead of watering, coat the surface of the entire container with a mister. Especially if your container doesn't have a drainage hole. Succulent roots and cuttings are very sensitive to root rot. So to avoid over watering, a mister will do the trick!
 
I sure hope you will try this.
No green thumb necessary!