
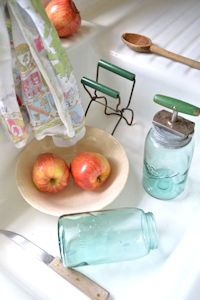

My goodness it has been a long time since I have posted! Fall was absolutely beautiful on Sanibel Island. I'm spending a few days getting caught up on the duties I have neglected as of late. Looking around at the fall decorations, I thought this would be an appropriate time to share my tips for drying out your gourds for next year!

Drying Gourds:
1.
Rinse off and dirt and debris from the gourd.
Then disinfect the rind of the gourd with a diluted bleach solution or
distilled vinegar. Dry the surface with a clean dry cloth.
2.
Find a suitable area for drying the gourds. The ideal
environment must be dark, cool, dry, and well ventilated. Damp rooms can cause
the gourds to rot. Fans help in the drying process.
3.
After choosing an area, take care in positioning
the clean gourds for drying. To allow for adequate circulation, do not allow
the gourds to touch each other. Placing the gourds on a wire drying rack will
insure for proper air circulation.
4.
To speed up the drying time, pierce the bottom
of the gourds using a nail or a small drill bit. Then place paper or plastic
below the drying rack to protect the floor from any dripping. It is a good idea
to rotate the gourd from time to time and inspect the gourds for signs of mold.
Discard any gourds that begin to show signs of rot.
5.
To determine whether the gourds have dried
completely, shake them to hear if the seeds rattling inside. The entire process
can take a few weeks to a few months depending on the type of gourd and the air
conditions.

Painting Gourds:
1. Gourds are fragile when dry and should be handled with care.
2. Gently sand the shell of the gourd with steel wool. Clean with a dry cloth or remove dust with a clean dry paintbrush.
3. To achieve a natural look, paint the exterior with a clear matte polyurethane paint. Spray paint works well but be sure to protect all work surfaces and rotate gourd to seal all sides.
4. For painted gourds, fill the nail holes with a tiny amount of spackle. Allow to dry then gently sand and wipe clean.
5. To achieve a shabby-chic look, paint the entire surface with a cream acrylic paint. Even house paints work well for this project. Avoid shiny or gloss finishes. Don’t worry too much about coverage because several coats will be applied. Once the first coat is completely dry, lightly white wash the entire gourd using a pure white paint. Allow this stage to dry then sand the surface to acquire a “distressed” appearance.


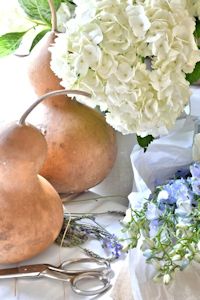
Decorating with Gourds:
Think of the dried gourds as any other beautiful home
accessory. For the most impact, display them clustered together in bowls,
baskets or urns. They can become incredible centerpieces with the addition of
dried flowers like baby’s breath and hydrangeas. For a more subtle approach,
tuck the little beauties throughout the house: on bookcases, in cabinets, on
shelves and along a window sill.

Tips to remember:
1.
It is important to display gourds in a dry
place. If introduced to moisture (like in a bathroom or outdoors) they could rot.
2.
Store dried gourds in an air tight container in
a cool dry dark space (closets are ideal). It is worth adding silica packets to
the container to keep moisture at bay.
3.
Remember the old adage…one rotten apple can
spoil the barrel. The same is true for gourds. If one rots, discard it
immediately before any others are ruined.
4.
Handle
gourds with care as they are fragile when dried. Clean with a dry cloth.
5.
Get creative! There are so many uses for dried
gourds and endless craft project possibilities. Look online or at the library
for terrific tips and ideas.

Thanks for visiting my blog...
I hope you've been inspired to try drying gourds!
Enjoy your Thanksgiving weekend!

No comments :
Post a Comment