

Pumpkins are the quintessential sign that fall has arrived.
I love to see them popping up in many different forms and colors. For my article in the fall issue of Cottages and Bungalows magazine I wrote an article featuring pumpkin and gourd crafts.
Pictured below are the "how-to" steps for creating
a whimsical felted pumpkin...enjoy!

Felt Pumpkin
Materials:
Felt (pumpkin) and coordinating solid color cotton fabrics (stem
and leaves)
Manila folder and pen or pencil
Small bag of cotton fiberfill (and pebbles)
Needle and thread
Florist wire
Scissors
Glue gun and glue sticks
Brown marker or brown shoe polish

Instructions:
1.
Make a template for the pumpkin “panels” using a
manila folder. The widest width is 3” and the length is 12” (see photo).
2.
Cut out 12 pattern pieces using the manila template
from a fabric of choice.

3.
Pin panels right sides together.
4.
Stitch the panels together to form the pumpkin shape
(it will be inside out) and leave a small opening for filling.
5.
Turn pumpkin right side out and fill with fiberfill
or batting. Sometimes it is helpful to add weight to the pumpkin so consider
tucking a few small clean rocks into the center of the filling. Close the
opening once filled with a few stitches.

6.
Create a fabric stem or use a real twig or branch.
Sew or hot glue the stem at the top of the pumpkin.
7.
Make leaves by cutting a 5” x 5” square of fabric.
Hand sketch or use a template to create a leaf pattern on the fabric square and
neatly cut out the design.

8.
For a realistic detail, hand-stitch the leaf veins
using contrasting thread.
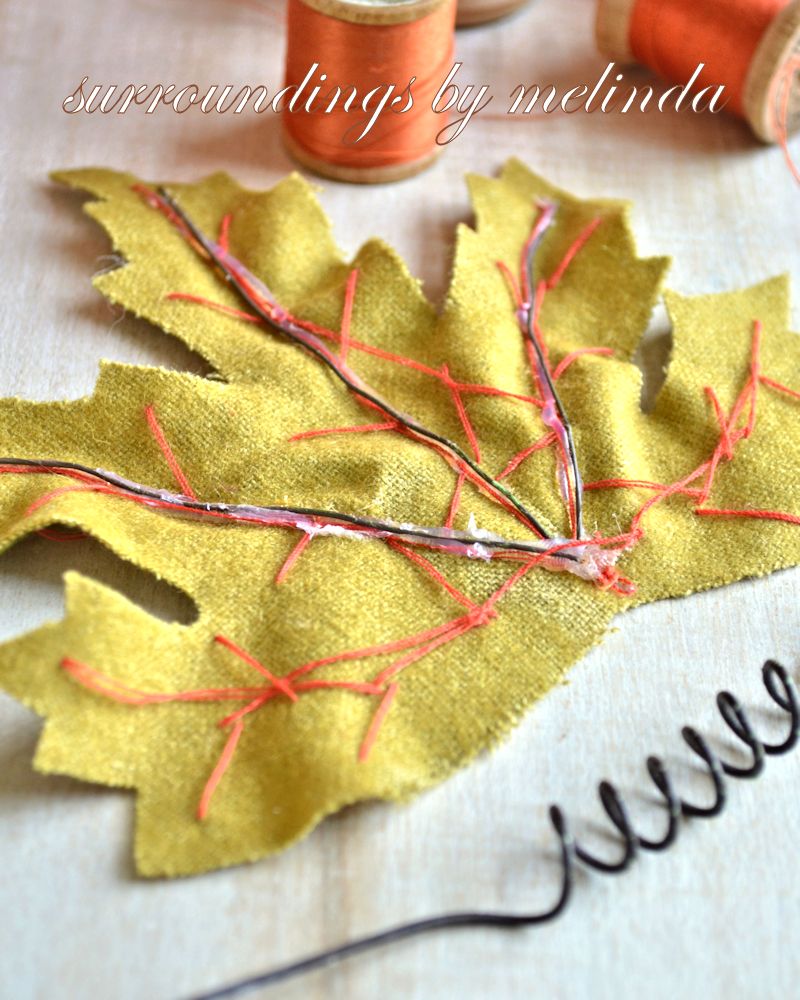
9.
Hot glue
lengths of wire to the back of the leaves to give them shape then hot glue in
place at the base of the stem. Make a few vines by wrapping wire around a
pencil then glue the wire vine at the base of the stem near the leaves.

To give the felt an
aged appearance, lightly darken along the seams with a brown marker or a touch
of brown shoe polish.

Be careful and have a gentle touch!

This project was featured in the Fall issue of
Cottages and Bungalows magazine...

Let this fall holiday craft project be your guide...

...then add your own personal spin.

Create pumpkins in colors that tickle your fancy and add embellishments that coordinate to your personal style.

The next thing you know...you’ll have a pretty
pumpkin patch
sprouting up right inside your home.

No comments :
Post a Comment